String Silencer Installation
Additional Tools needed: -Scissors -Super Glue -Lighter
-Click here for a text only version
Step 1
Grab three 2 1/2" strips Make sure, if you purchased a multi colored silencer, to grab the correct colors.
Step 2
Stack the three strips and wrap them(longways) around the string, close to the area you want to install the silencer.
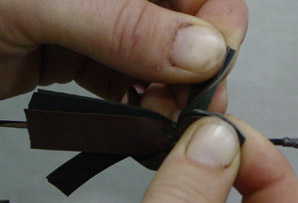
Step 3
Tie about 6-7 regular knots in the center. Make sure to tie them very tight. This will help keep the silencer in place and make the silencer more springy.
Step 4
Cut the excess string off, leaving about 1" of material so you can burn it.
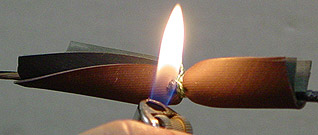
Step 5
Burn the string with a lighter, making sure not to burn the silencer material. Once the string material lights, it should burn down to a ball. Extinguish the flame so that it doesn't burn your silencer and press the melted fibers firmly with your lighter or fingers (caution may be hot). This method will keep the string from unraveling.
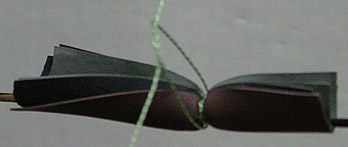
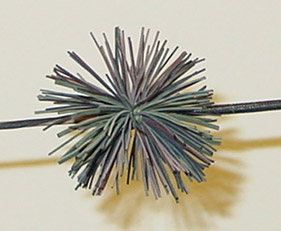
Diagram
By now it should look something like this.
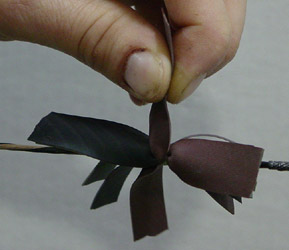
Step 6
Right now you have 6 wings. It is much easier if you split each wing in half, leaving you with 12 wings. You don't have to do this, but we recommend it.
Step 7
Grab the top of a wing. If you have your bow in a bow press, you can do this with one hand. If you do not have your bow in a bow press, it may be a little tougher or may require some help from a friend.
Step 8
Stretch the wing about 6 inches or tight enough to where it doesn't want to stretch much more. Now take a pair of scissors and slowly cut the wing right below your finger. The material will automatically separate Repeat this for all wings.
Step 9
Squeeze your silencer and trim it up. This is not necessary but it will look nicer.
Step 10
Slide your silencer to the side and place a dab of super glue where you want the silencer to rest.
Step 11
You do not want to get any super glue on any strands so pull them all back and then slide the silencer over the super glue.
Step 12
Again, make sure to keep the strands pulled back as you slide your silencer over the super glue.
This is what your silencer should look like when your done.